
So this is my first time ever in participating in a blog hop of any kind, especially for PTI so it makes me a little nervous. Hahaha. Usually I'm just a commenter. I love to look at other people's blogs--such amazing ideas and projects.
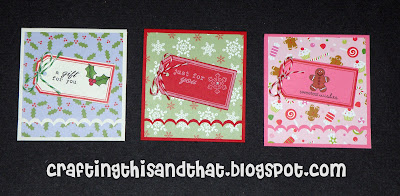 These might look familiar. I made something similar HERE. I kind of tweaked it a little since the first one I made was a tight squeeze for the tags I made.
 The tags fit better this time because I left more space above.
 It also helps that this matchbook cover doesn't fold flat.
 I started with a 3.5 x 8.5 inch cardstock.
 I scalloped one edge and then scored it a 3/4 inch, 4.5 inches and 4.75 inches.
 I used the pocket die to hold the labels and taped that about 1/2 inch above the score line closest to the scalloped edge. I added thin tape below the scallop edge and folded that over for the cover to slip into. You may have to trim the cover just a bit for the cover to slip in nicely and not push the tape down too much--if that makes sense.

 I love the Tiny Treats series. The images are so cute! I used the Xmas one for these tags. I used the Fillable Frames die #9 and the stamp set.

 Snowflakes! Five tags fit nicely in the pocket. You could make this matchbook longer and add more pockets to add more tags. This is a nice stocking stuffer size.

 I love this one because it's pink! The paper obviously isn't a PTI product but I wanted to try a nontraditional Xmas color.
Everything here is from PTI except for the red and green baker's twine, the pink candy paper, one tiny rhinestone in the snowflake that's on the cover and the scallop punch I used. I also used my copics and white gel pen.
Thanks so much for reading and have a wonderful Thanksgiving!!


Everything here is from PTI except for the red and green baker's twine, the pink candy paper, one tiny rhinestone in the snowflake that's on the cover and the scallop punch I used. I also used my copics and white gel pen.
Thanks so much for reading and have a wonderful Thanksgiving!!
Comments
Hope you have a wonderful Thanksgiving!
It's a good life!
Terri E
hugs,
Viola
Have a GREAT day!