
Hi! It's time again for PTI's blog hop! With their new weekly Make It Monday Challenges and the blog hop, I've been making so many more PTI projects than before. Now my PTI stamps and dies don't feel as neglected. The February Challenge is below.
 This month we decided to dedicate the Blog Hop to scallops! We want to see your best use of scallops, of any sort, on a project! This can include scalloped borders, offset-scallops, stamped scallops, scalloped mats, scalloped frames, layered scallops, scalloped tags or anything else you can dream up! You can use dies, patterned scissors or even circle punches in a row to achieve your special look. We are looking forward to seeing all of your amazing creations!
I think I may have a lot of pictures to share so I hope you can make it to the end of this post!
 The first thing that came to mind was to make some flowers using scallops. I used PTI's large scallop border die to cut some red felt and I sewed some thread through.
 I pulled the thread to form a flower!
 I overlapped the last and first petal and pulled it tight and sewed the flower closed.
 I made a pair of these. I used the smallest die from Beautiful Blooms II die set and sewed a button on too.
 I also made a larger one. I made a larger flower in the back of this one but didn't pull the thread as tight.
 This is how the back looked.
 Kind of had some holes in it so I added some stuffing.
 Then I hot glued on some felt circles to keep everything together.
 I hot glued the red flowers on to plain metal pins. Metal and hot glue is very HOT as I've learned. Even when you're pressing away from the glue area. The heat just spreads. Anyway, I glued the yellow one to an elastic band.
So after I made these flowers I wanted to try smaller sized scallops but I don't own any small scalloped border dies so I used Spellbinders scalloped circle dies.
 I placed them on my Big Shot and cut some felt.
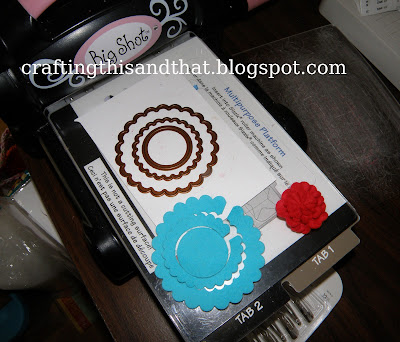 I ended up using only the 2 smallest scalloped circles to make the red flower above. I used the same technique of sewing through and pulling the thread tight.
 I made them in different colors. I really wanted to make one in raspberry fizz but I ran out! I'm waiting for my next PTI order. I like these flowers cause they are small but also because it seems safer for younger toddlers. No buttons or anything.
 Hot glued some felt circles on the backs.
 You can make so many different kinds of flowers using different color combos.
 I wanted to package up the smallest flowers as a baby gift. So I used PTI's clear case and cut it to the size I wanted. I saved the top to insert it back into the bottom so I could close it again.
 Made holes in a piece of clear plastic. I used the smallest Spellbinders circle die but it didn't cut all the way through so I used my blade to cut it through. Hopefully it's not too messy looking. I saved a space for where I want to put the raspberry fizz flower.
 Wrapped it all up PTI-style. I'm giving the other flowers to my daughter. I hope they stay glued on!
 Oh yeah, this is the last flower I made. Not a bad looking rose. I used the second to largest scalloped circle and just wound it up and added some hot glue. Super easy!
Thanks for reading this long post! Have a great weekend!

I think I may have a lot of pictures to share so I hope you can make it to the end of this post!


So after I made these flowers I wanted to try smaller sized scallops but I don't own any small scalloped border dies so I used Spellbinders scalloped circle dies.


Thanks for reading this long post! Have a great weekend!
Comments
Thanks!
Janna