Sister Stamps Release #20 is today!


Hello!  The latest Sister Stamps are out!  There is a list of stores that sell them on the Sister Stamps blog sidebar.

Typically, the DT doesn't create anything for release day but because we had a break and I was kind of crazy feeling, I made some calendars.  So you're thinking, oh boy, more calendars but these are different, people.  Remember when I said, or wrote, that I should start making 2015 calendars?  Well, I did!  I bet a whole bunch of you thought I wouldn't but I made five 2015 calendars!  Three of them use the new Sister Stamps girls and the other two have the ever popular and loveable Hello Kitty.

This is the first one I made using a calendar I found on the internet and features Misaki.  It measures 5.5 by 8.5 inches and is on heavy chipboard.  It is pretty sturdy and should last the whole year.  There is some ribbon on the back to hang up somewhere.

Then I realized, hey I should make my own 2015 calendar templates so I did.  And I think mine are cuter cause the font is fun looking.  Boy, it took me a few tries to get it looking the way I liked and a few wasted print outs too.  This calendar is 4 months across and 3 down so it fits nicely on this vertical calendar.  This one features Minako and Misaki's birdie friends.  The corner die and the pagoda die is from La-La Land Crafts.

I also made my own calendar that is 3 months across and 4 down to fit on the horizontal calendars.  This one is more clean and features Harumi with that same cherry blossom embossing folder I used in a previous post.  I bought mine online from 7 Kids College Fund and I think it was from Nellie Snellen.

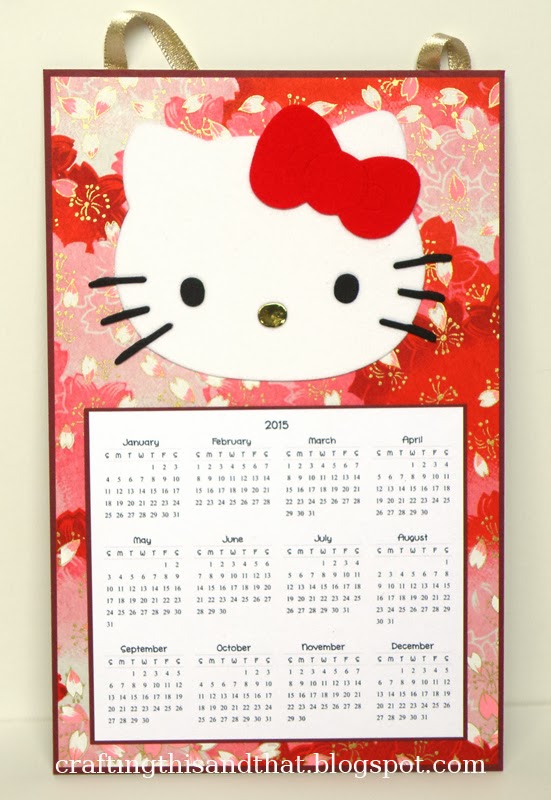
I bought this large Hello Kitty die from J's.  I think these would make great gifts for my daughter's friends.  It's difficult to see but I cut this Hello Kitty using some old Doodlebug crushed velvet cardstock so it is soft.

This is the last one.  Hello Kitty has a glittery purple bow.  So my plan is to try to make a few calendars every month.  If only stores would sell calendars early.  I am stalking Taylored Expressions for 2015 mini calendars.  Maybe if I'm desperate enough I could make my own.

CC Designs previews is coming up soon too so I'll be back for a couple more posts next week.

Thanks so much for stopping by!


Comments

Blankina said…
Hi Eva, how sweet these new stamps,
great calendars..Hope you will have a great weekend,
Hugs Blankina
Rachel Parys said…
These are all so cute!!! I agree, stores should sell more calendars way in advance!!!
Jenny said…
Ah! We had the same thought! Except you are waaaay ahead of the game! Love your layouts. Thanks for all your help!
Great sets Eva... you rock those calendars... You will be inspiring lots of peeps...LOL!
Cheryl said…
Ha! yeah, didn't think you would get started so early! Really pretty calendars! That was a good idea to make your own calendars...the font does look cuter! The pagoda looks really nice in gold! Cute Hello Kittys too!
Jazzmom said…
Beautiful calendars! Great inspiration - & a good idea to start early! :)
Denice said…
Oh so sweet....the new images are looking better and better, every time I see them.
I was just thinking about 2015 calendars....thanks for the inspiration.
:Dxx
Leanne said…
These are gorgeous Eva!! Beautiful colors wonderful prints and oh so cute girls with gorgeous colorings. Love the HK calendars too. Great idea to fun up the calendar too. Loved your projects for this release, well duh I love all your projects for everything. ^.^
RiNNE said…
These are all gorgeous, Eva! They look professionally made!

Popular posts from this blog

TGF 3rd Annual Customer Blog Hop

Hi!  After finishing up these 2 projects for TGF's Blog Hop , I've come to realize that I am kind of addicted to stamps, especially TGF stamps.  Hehe.  Okay, I will not babble on too much since there are lots of other blogs to check out as well.  I made something for both categories, Holiday and General. First up is my Holiday card. I recently acquired Hippie Anya!  She inspired me to make a "peace" card for the holidays. But then I had to add Fleur Anya for "love" ... and 80s Anya for "joy."  So great that these stamps could be turned into something Christmas-y. My General project has been swimming in my mind ever since I made that counting book a while back with TGF stamps as well.  I thought I could make an ABC book too.  But I didn't make this into a book.  More like flashcards, I suppose.  My youngest has a hard time recognizing lower case letters so I thought this would be fun for him.  All stamps are TGF.  I ...

My Mind's Eye and Perfect Paper Crafting Blog Hop!!

Hello!  Welcome to another Perfect Paper Crafting blog hop !  Today, the Perfect Paper Crafting Design Team will be featuring projects with My Mind's Eye products.  There is a $50 gift certificate to the Perfect Paper Crafting online store available to one lucky person who comments on all the blogs along the hop.  My Mind's Eye is also giving away their Happy Haunting collection.  You have until Friday, November 1st at 12:00 AM PST to leave your comments.  Good Luck! It's a short hop list this time around! Perfect Paper Crafting & Laura My Mind's Eye Pam Jenny Eva (Me!) Roxie Recently, I saw these layering tags dies and thought I really wanted those.  I love the look of layered tags so I used my Perfect Layers rulers to make some with My Mind's Eye Happy Haunting papers. I have a tag die from Papertrey Ink so I used that as my smaller tag.  I glued that tag onto kraft cardstock and used my ruler to cut a 1/8th inch border aro...

upcycling Pokemon wrappers

Hello everyone!  I am back with my latest sewing creations.  I have been playing around with plastic wrappers!  I've seen those upcycled plastic wrap bags and purses (usually made from Capri Sun package juice) but never really paid attention to them or how they were made until I saw this tutorial using the wrappers from Pokemon cards.  My boys love Pokemon cards and were just throwing the wrappers away but I started saving them and collected enough from their recent birthdays to make a couple of items.  Here is a little coin pouch (didn't want to call it a purse since it's for my youngest boy and he'd probably not like that).  This little pouch was made with 4 wrappers, 2 in front and 2 in back.  It is a bit tough to turn right side out because the wrappers and contact paper get stiff.  But it's possible and looks really neat!  I made it so he could hang it from the inside of his backpack and also carry around a little bit of emergency...